...
| 1 | Browse to the Microsoft Azure portal at https://portal.azure.com/ and login with an Azure AD administrative user account. |  | ||
| 2 | Select the Microsoft Entra ID service, or browse to https://portal.azure.com/#view/Microsoft_AAD_IAM/ActiveDirectoryMenuBlade/~/Overview | |||
| 3 | Select the App registrations tab. | |||
| 4 | Click New registration. |  | ||
| 5 | Provide the name Rampiva Automate. | |||
| 6 | Select the supported account types Accounts in this organization directory only. | |||
| 7 | Configure the Redirect URI to the type Web, with the value http://localhost/api/v1/users/oidcResponse
| |||
| 8 | Click Register. | |||
| 9 | After the application is created, take note of the Application (client) ID, and the Directory (tenant) ID.
|  | ||
| 10 | Select the Certificates & secrets tab. |  | ||
| 11 | Click New client secret. | |||
| 12 | Name the secret Rampiva Automate. | |||
| 13 | Click Add. | |||
| 14 | Copy the secret value and take note of it.
|  | ||
| 15 | Select the API permissions tab. |  | ||
| 16 | Select Add a permission → Microsoft APIs → Microsoft Graph:
| |||
| 17 | Grant admin consent for the permissions. |  | ||
| 18 | Confirm that admin consent was granted. |  |
...
| 1 | The Purview Download Permissions are required to download data exported to Microsoft Purview.
| ||||||||
| 2 | Connect to Azure AD from PowerShell, with permissions to read/write application settings. |
| |||||||
| 3 | Log in to Azure AD. |  | |||||||
| 4 | Create a new service principal for the Microsoft Purview eDiscovery app.
|
| |||||||
| 5 | Confirm that the service principal was created successfully. |  | |||||||
| 6 | In the Microsoft Azure portal, open the Microsoft Entra ID service, or browse to https://portal.azure.com/#view/Microsoft_AAD_IAM/ActiveDirectoryMenuBlade/~/Overview | ||||||||
| 7 | Open the previously configured App registration. |  | |||||||
| 8 | Select the API permissions tab. | ||||||||
| 9 | Select Add a permission → APIs my organization uses → MicrosoftPurviewEDiscovery:
| ||||||||
| 10 | Grant admin consent for the permissions. |  | |||||||
| 11 | Confirm that admin consent was granted. |
...
| 1 | Browse to Rampiva Automate. |  | ||
| 2 | Select the Settings tab. | |||
| 3 | Select the Authentication Services tab. | |||
| 4 | Click Add+ Microsoft Authentication Service. | |||
| 5 | Name the service Microsoft 365 - example.com, where example.com is the name of your domain. | 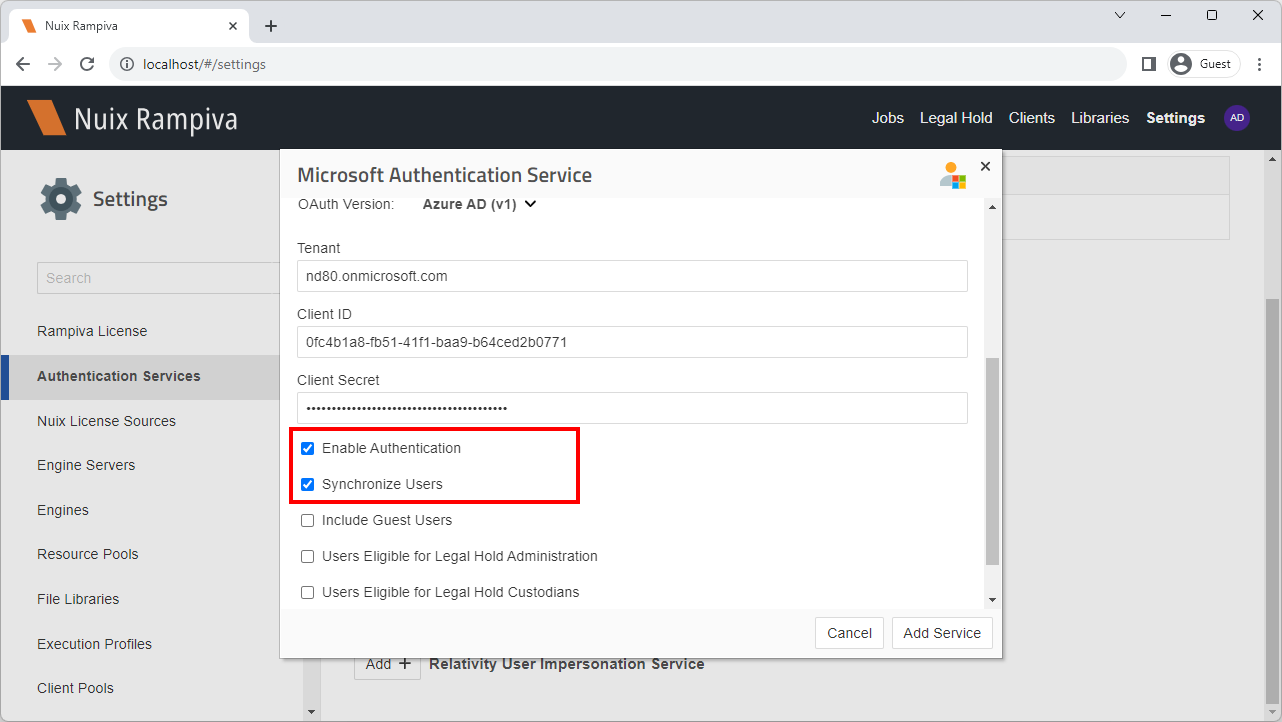 | ||
| 6 | Select the environment Microsoft Commercial. | |||
| 7 | Fill out the Tenant, Client ID and Client Secret with the values recorded from the previous section. | |||
| 8 | Leave the Enable Authentication option enabled.
| |||
| 9 | Check Synchronize Users option. | |||
| 10 | Click Add Service. | |||
| 11 | Select the Third-Party Services tab. | 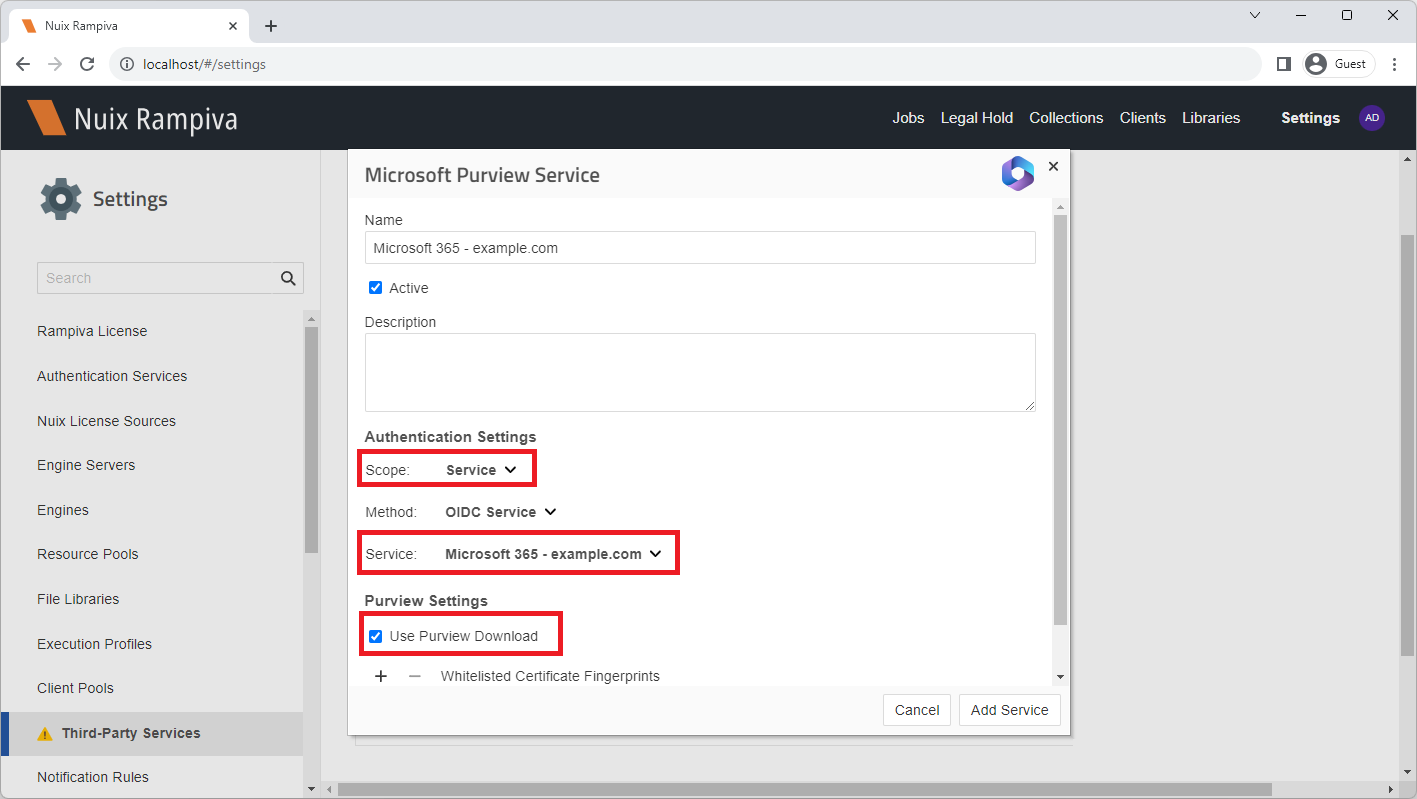 | ||
| 12 | Click Add+ Microsoft Purview Service. | |||
| 13 | Name the service Microsoft 365 - example.com, where example.com is the name of your domain. | |||
| 14 | Set the authentication Scope to either:
| |||
| 15 | Select the authentication Service Microsoft 365 - example.com create previously.
| |||
| 16 | Enable the option Use Purview Download. | |||
| 17 | Click Add Service. | |||
| 18 | When prompted to sign-in with the Purview eDiscovery Manager account, sign in with a user account that has eDiscovery Manager permissions.
| 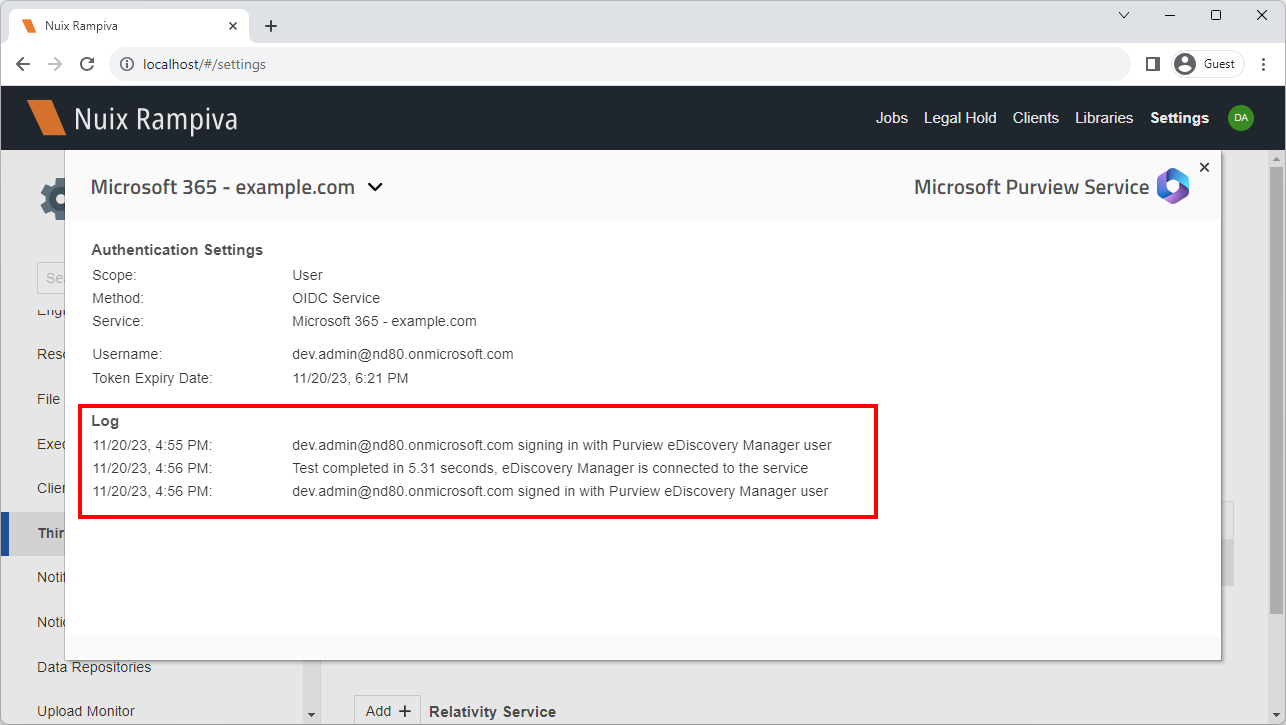 | ||
| 19 | Expand the Log section to confirm that the authentication was successful and that no warning messages are shown. |
...