...
This article is part of a series:
Submit a Rampiva Automate job from Microsoft Flow using the native connector: Integrate Microsoft Flow with Rampiva Automate (Native Connector)
Trigger a Microsoft Flow when an event occurs in Rampiva Automate - Integrate Rampiva Automate with Microsoft Flow (Native Connector)
Submit Rampiva Automate job using the API when a form is submitted in Microsoft Forms: Integrate Microsoft Power Apps with Rampiva Automate (API)
Trigger a Microsoft Power Apps Flow using a script when the status of a Rampiva Automate job changes: Integrate Rampiva Automate with Microsoft Power Apps (Script) (this article)
...
A. Create a Microsoft Excel File to Store the Data
| 1 | Create a new Microsoft Excel file. | 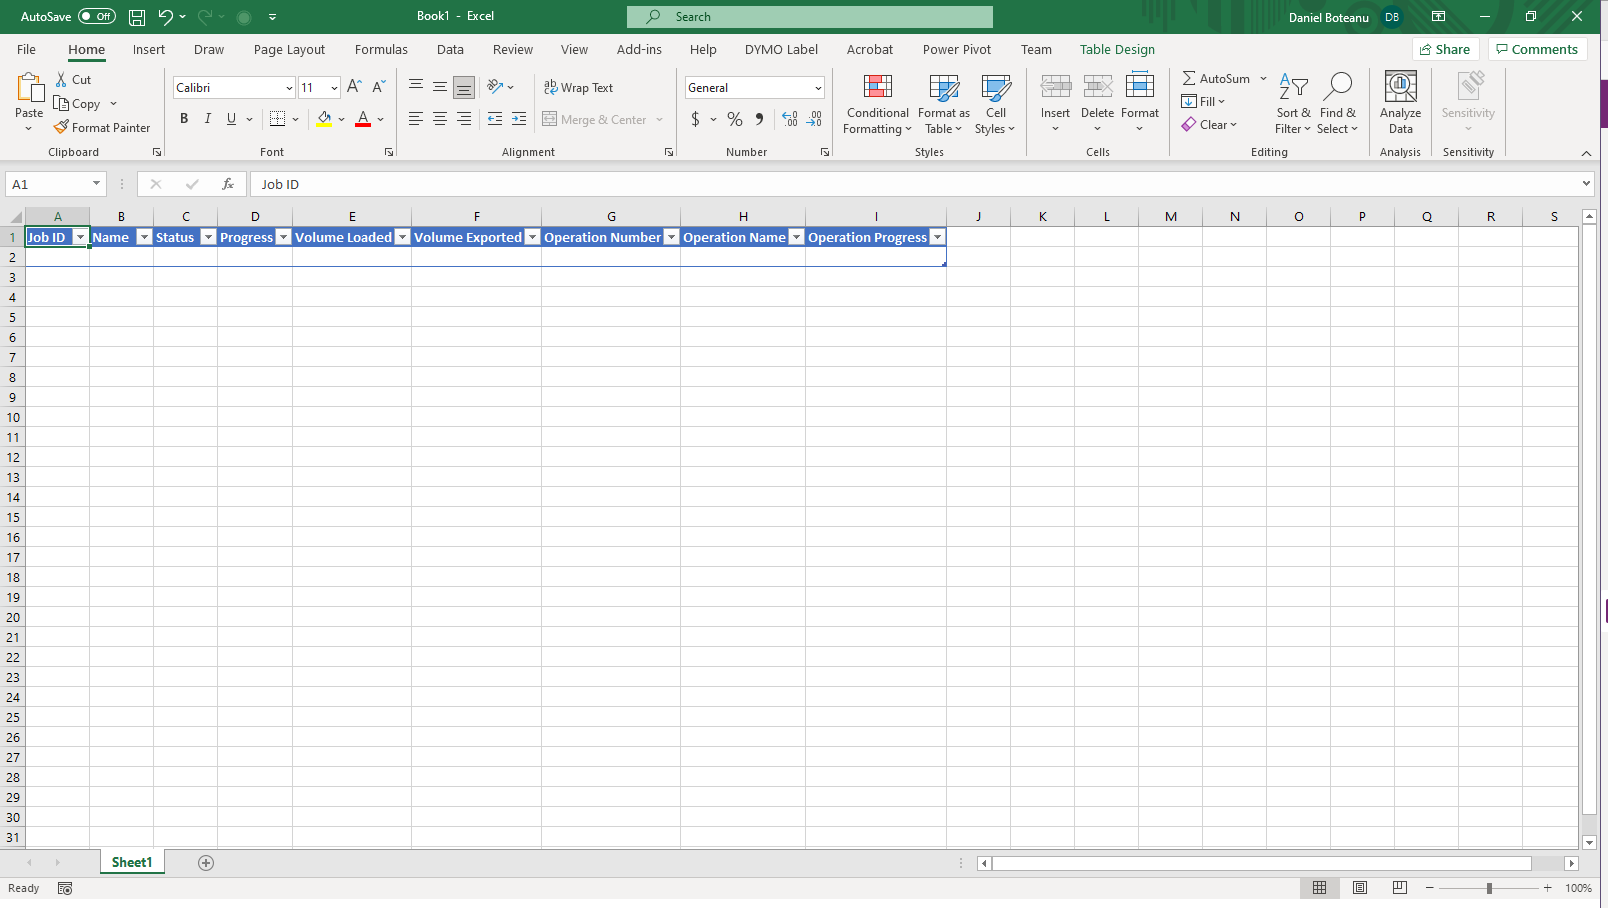 |
| 2 | Type in the following values in the top line:
| |
| 3 | Select the newly added values and from the Styles section click Format as Table and select any table format. | |
| 4 | Check the option My table has headers. | |
| 5 | Save the file on One Drive under the name Rampiva Job Tracker. |
C. Create the Power Apps Flow
| 1 | Open Microsoft Power Apps at https://make.powerapps.com/ | 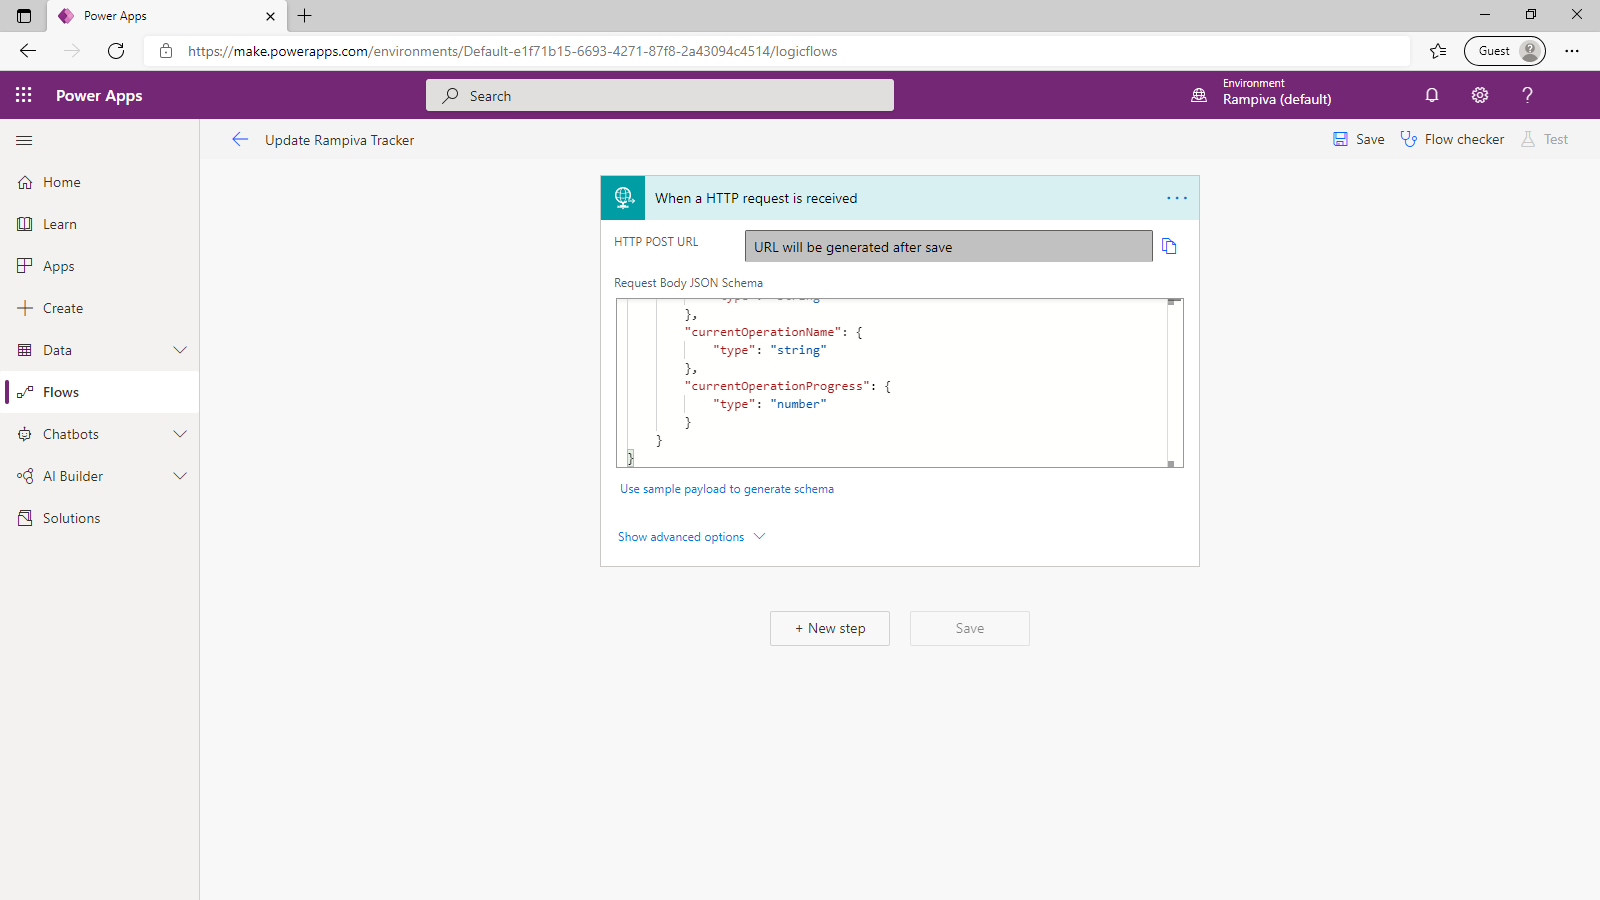 | ||||||||
| 2 | Select the Flows tab. | |||||||||
| 3 | Create a New flow of the type Instant cloud flow. | |||||||||
| 4 | Name the flow Update Rampiva Tracker. | |||||||||
| 5 | Select the trigger When an HTTP request is received from the Request app.
| |||||||||
| 6 | Expand the step details and select Use sample payload to generate schema and paste the following content:
| |||||||||
| 7 | Add a New step with the action Get a row, from the Excel Online (Business) app.
| 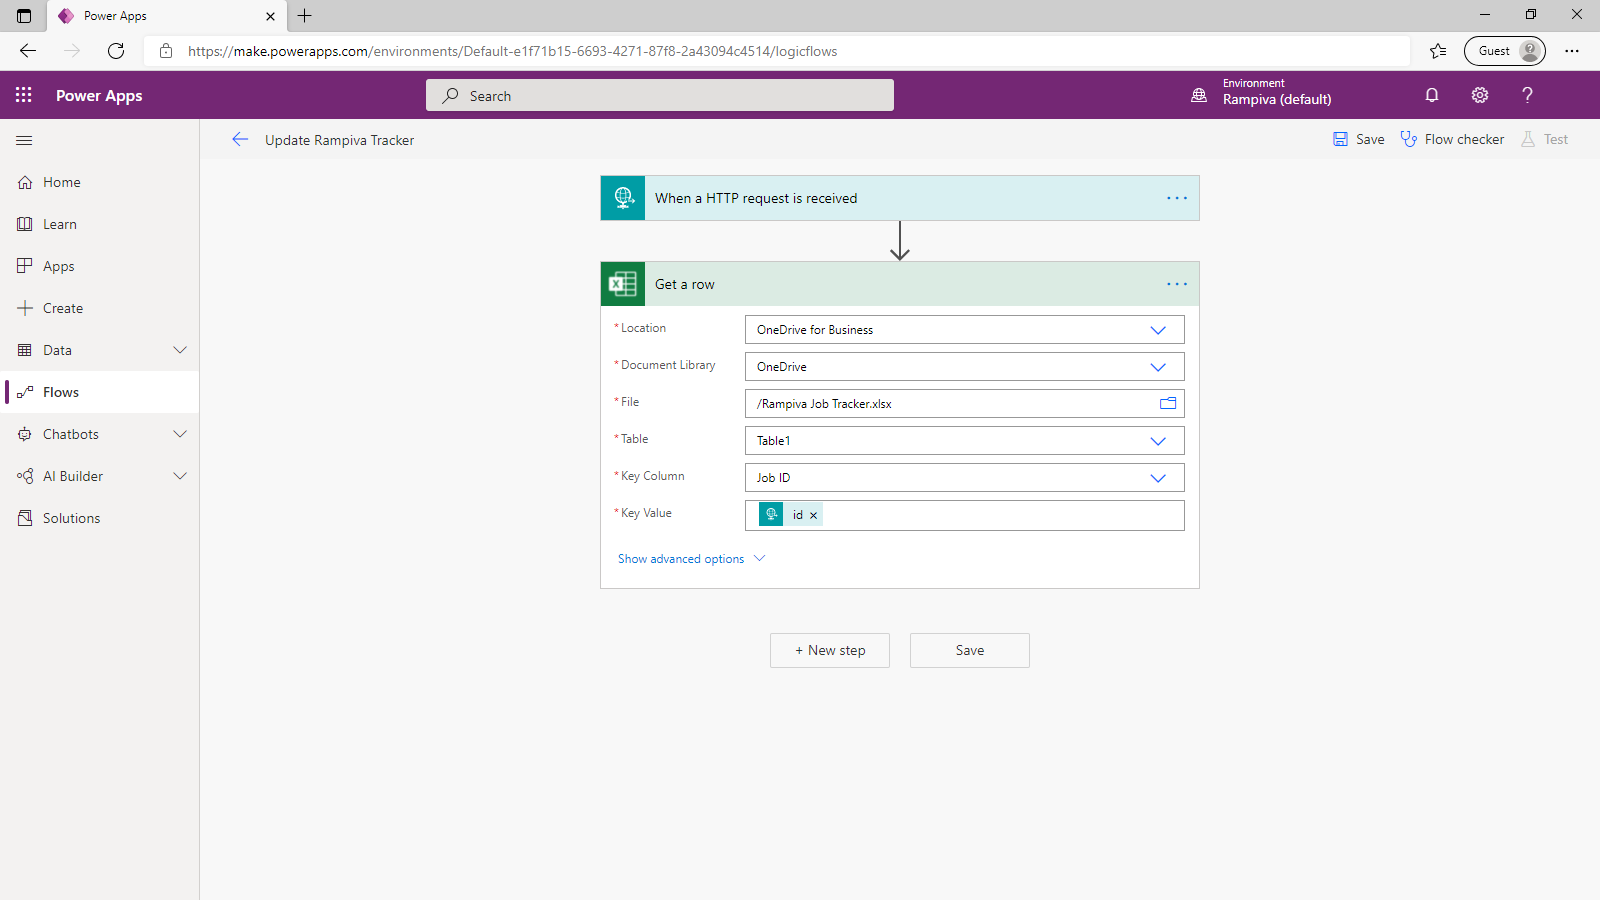 | ||||||||
| 8 | In the Location field, select OneDrive for Business. | |||||||||
| 9 | In the Document Library field, select OneDrive. | |||||||||
| 10 | In the File field, browse to the Rampiva Tracker.xlsx file create previously. | |||||||||
| 11 | In the Table field, select Table 1. | |||||||||
| 12 | In the Key Column field, select Job ID. | |||||||||
| 13 | In the Key Value field, add the dynamic content id from the When a HTTP request is received step. | |||||||||
| 14 | Add a New step with the action Update a row, from the Excel Online (Business) app.
| 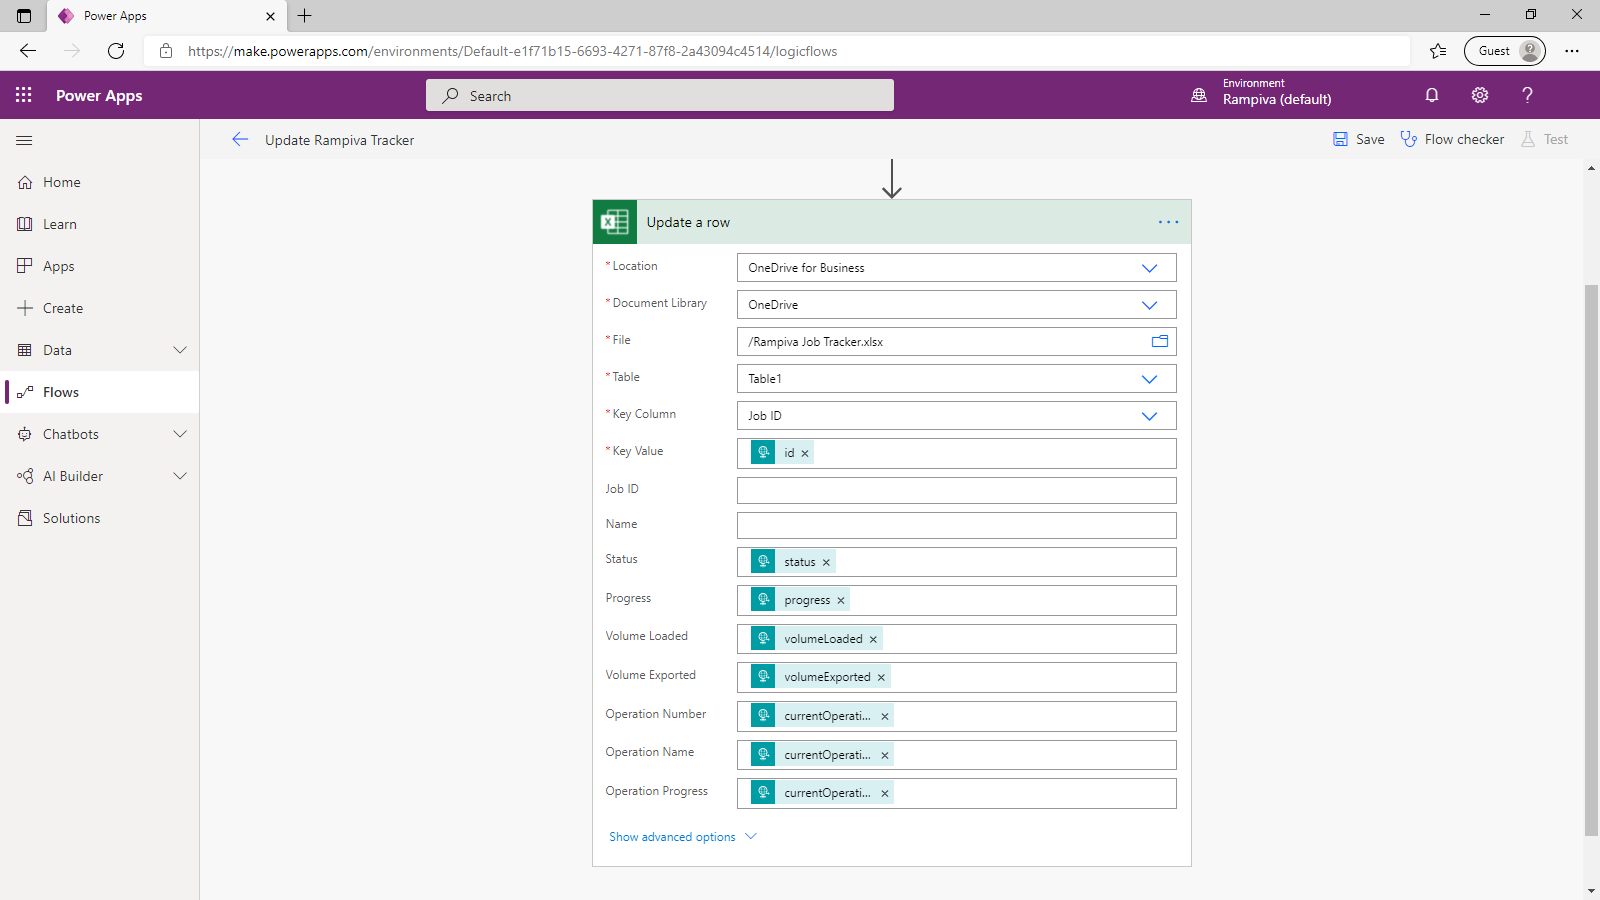 | ||||||||
| 15 | In the Location field, select OneDrive for Business. | |||||||||
| 16 | In the Document Library field, select OneDrive. | |||||||||
| 17 | In the File field, browse to the Rampiva Tracker.xlsx file create previously. | |||||||||
| 18 | In the Table field, select Table 1. | |||||||||
| 19 | In the Key Column field, select Job ID. | |||||||||
| 20 | In the Key Value field, add the dynamic content id from the When a HTTP request is received step. | |||||||||
| 21 | Leave the Job ID and Name fields blank. These fields do not need to be updated. | |||||||||
| 22 | Map all of the remaining fields with their corresponding counterparts dynamic content from the When a HTTP request is received step.
| |||||||||
| 23 | Minimize the Update a row step by clicking on the header. | 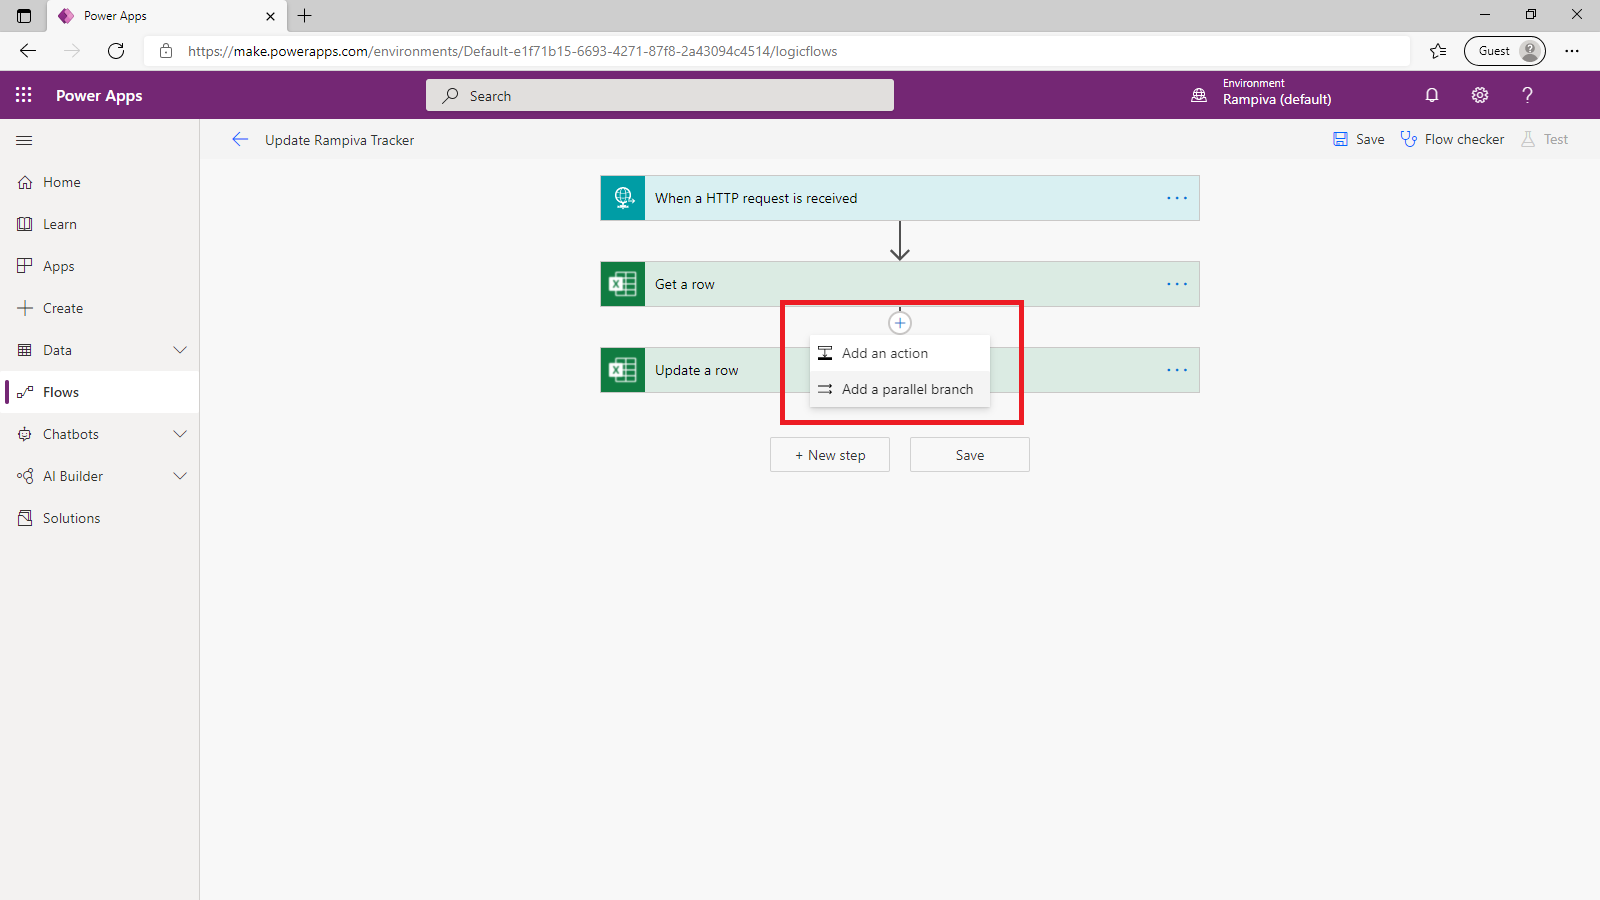 | ||||||||
| 24 | Select Add a parallel branch by clicking on the plus sign in between the Get a row and Update a row steps.
| |||||||||
| 25 | Click on the … symbol on the Update a row step and select Configure run after. | 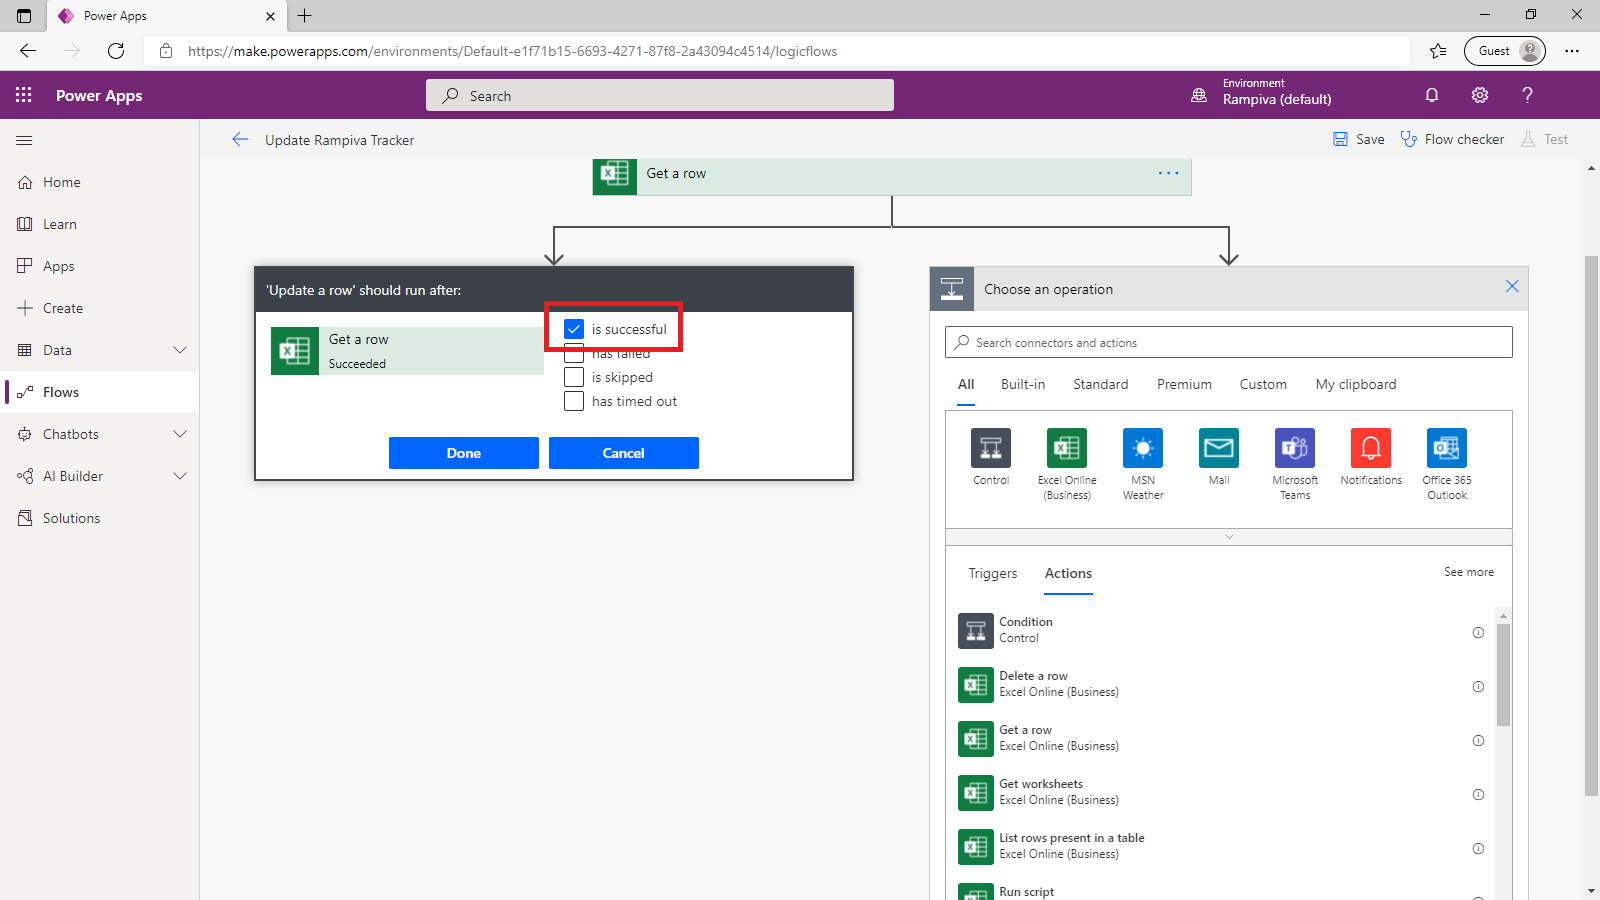 | ||||||||
| 26 | Ensure that the option is successful is selected and click Done. | |||||||||
| 27 | In the right-side branch, add a New step with the action Add a row into a table, from the Excel Online (Business) app.
| 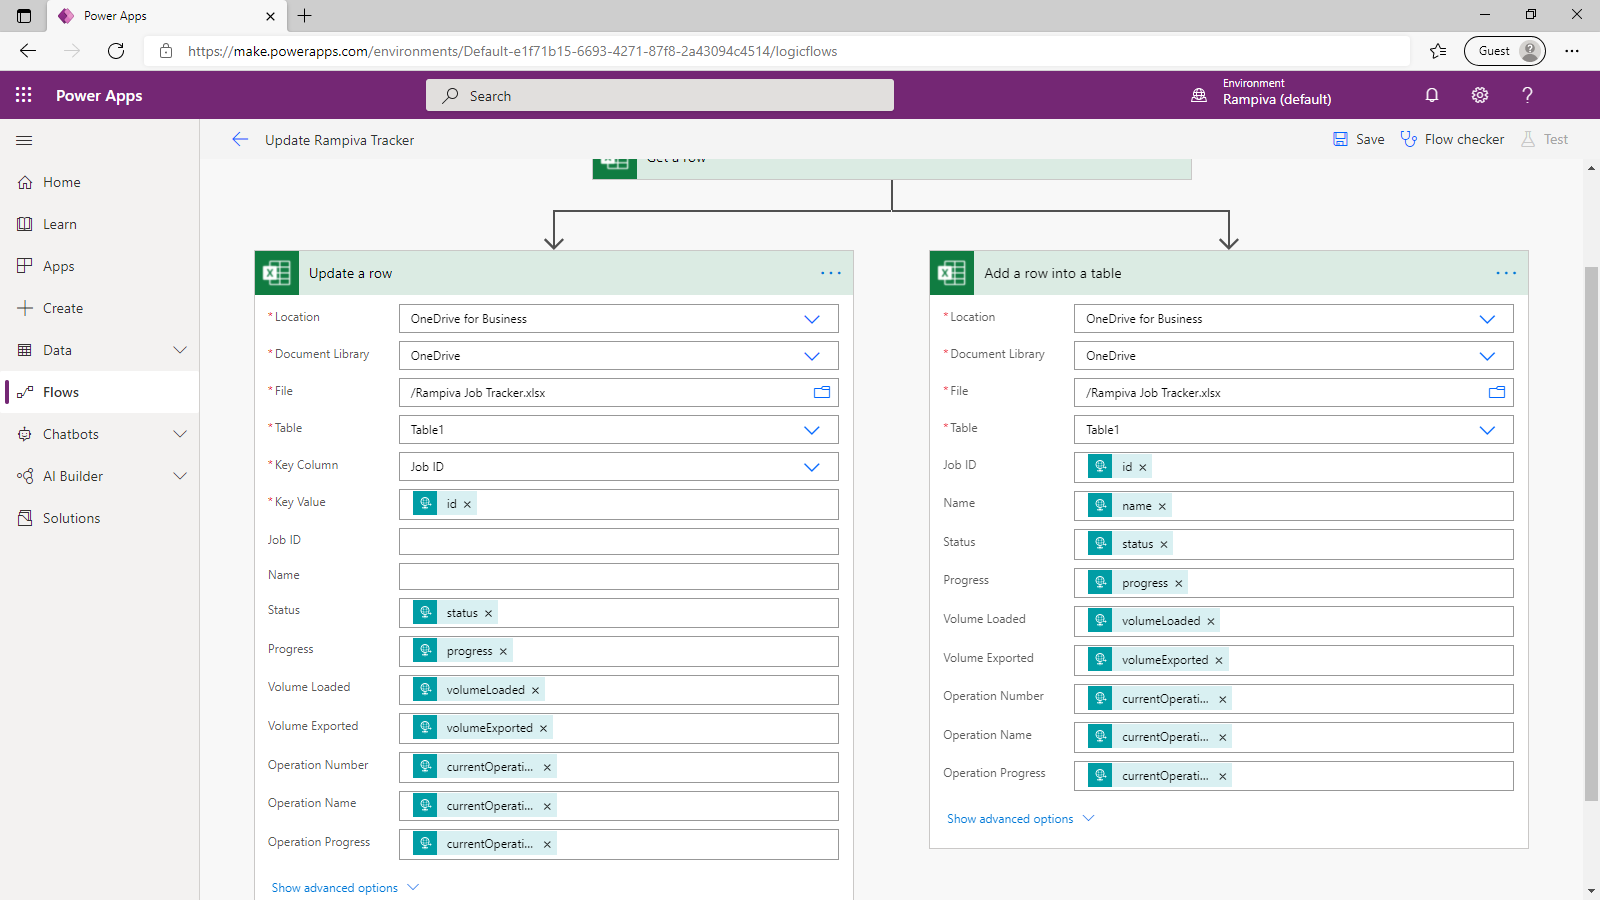 | ||||||||
| 28 | In the Location field, select OneDrive for Business. | |||||||||
| 29 | In the Document Library field, select OneDrive. | |||||||||
| 30 | In the File field, browse to the Rampiva Tracker.xlsx file create previously. | |||||||||
| 31 | In the Table field, select Table 1. | |||||||||
| 32 | Map all of the fields with their corresponding counterparts dynamic content from the When a HTTP request is received step.
| |||||||||
| 33 | Click on the … symbol on the Add a row into a table step and select Configure run after. | 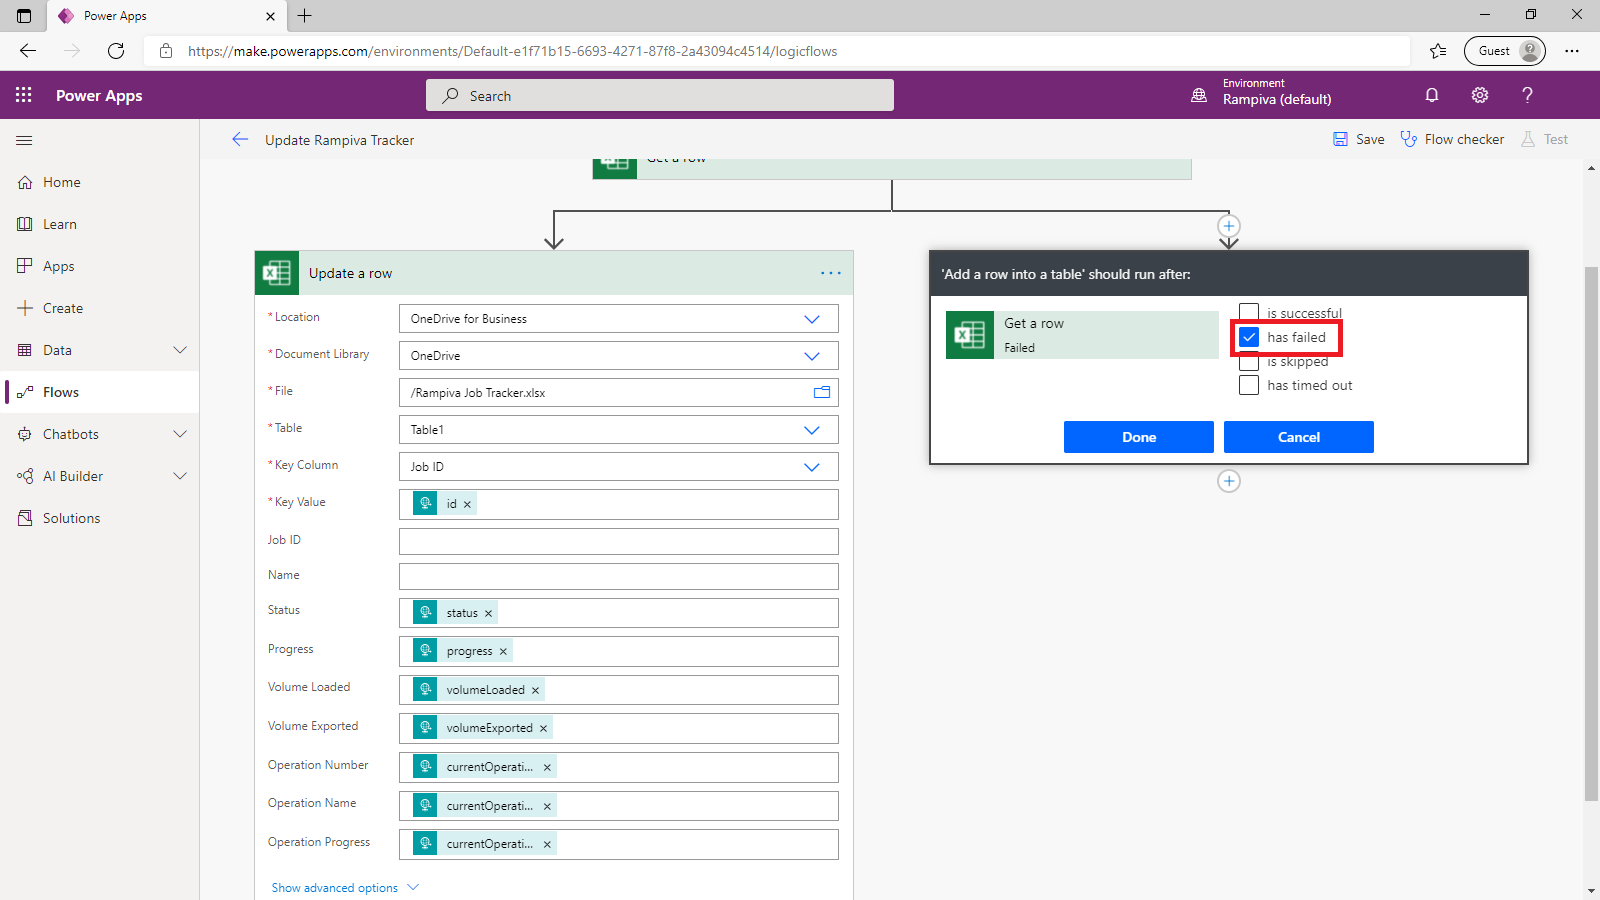 | ||||||||
| 34 | Check only the has failed option is selected and click Done.
| |||||||||
| 35 | In the right-side branch, add a New step with the action Terminate, from the Control app.
| |||||||||
| 36 | In the Status field, select Succeeded. | 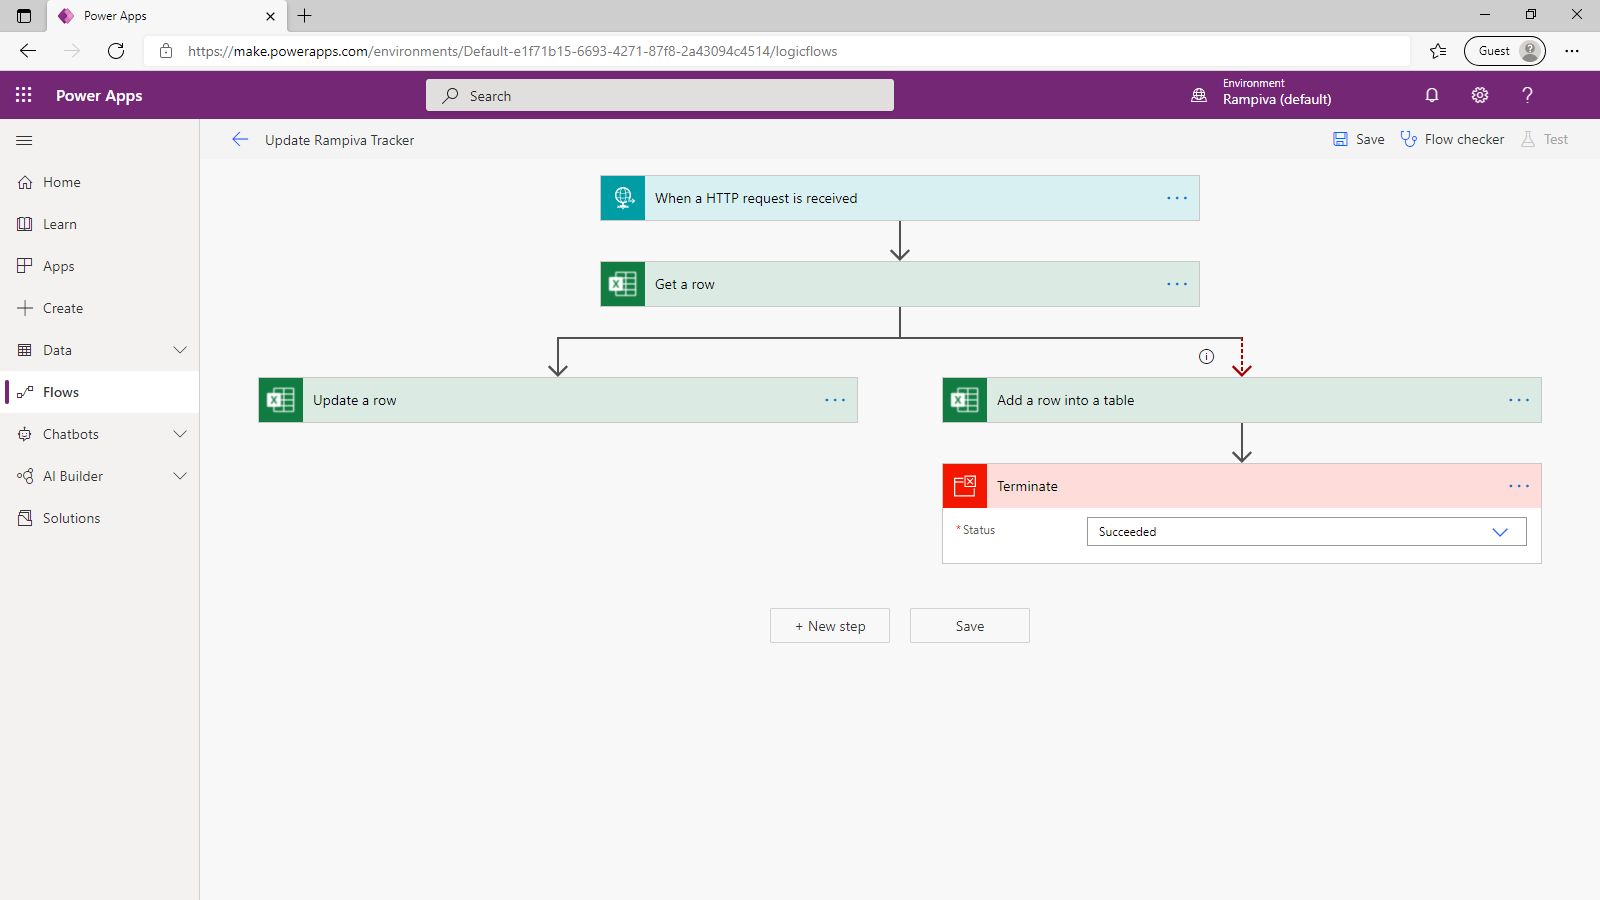 | ||||||||
| 37 | Click Save in the top-right section of the screen to save the flow. | |||||||||
| 38 | Expand the top When a HTTP request is received step, and copy the HTTP POST URL value. |
D. Test the Flow
| 1 | Open the website https://reqbin.com | 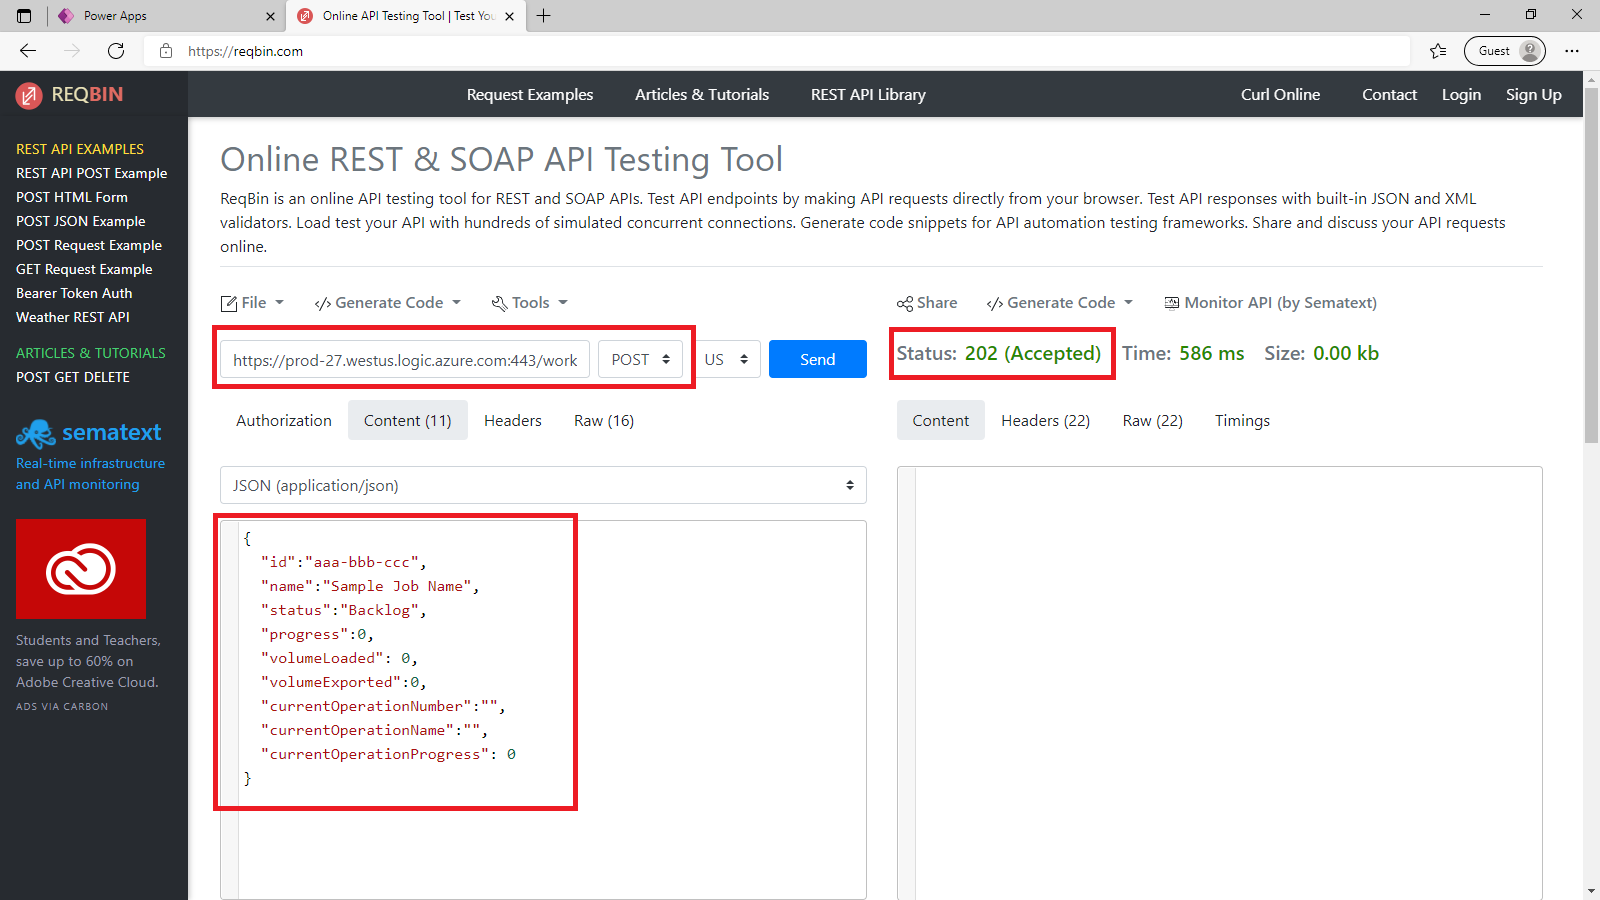 | ||||
| 2 | Replace the sample URL https://google.com with HTTP POST URL of the flow created in the previous step. | |||||
| 3 | Set the method to POST. | |||||
| 4 | In the Content tab, use the following sample data to create a new record with:
| |||||
| 5 | Click Send to submit the data and run the pipeline.
| |||||
| 6 | Return to Power Apps, to the Flows tab and select the Update Rampiva Tracker application.
| 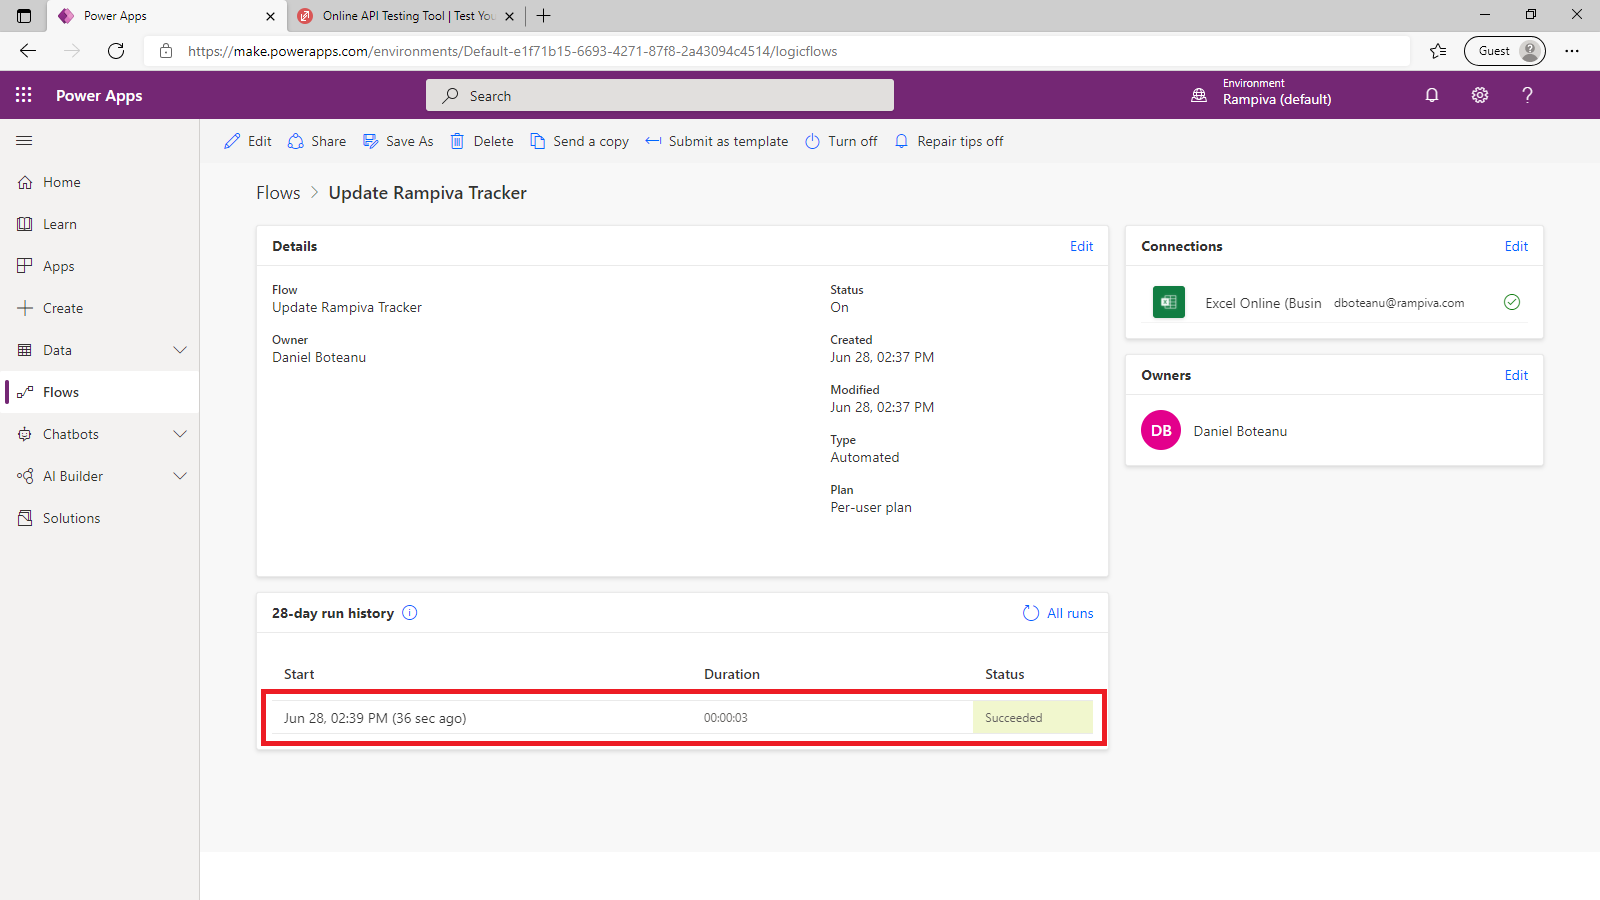 | ||||
| 7 | Open the Excel file Rampiva Job Tracker previously created in Excel Online.
| 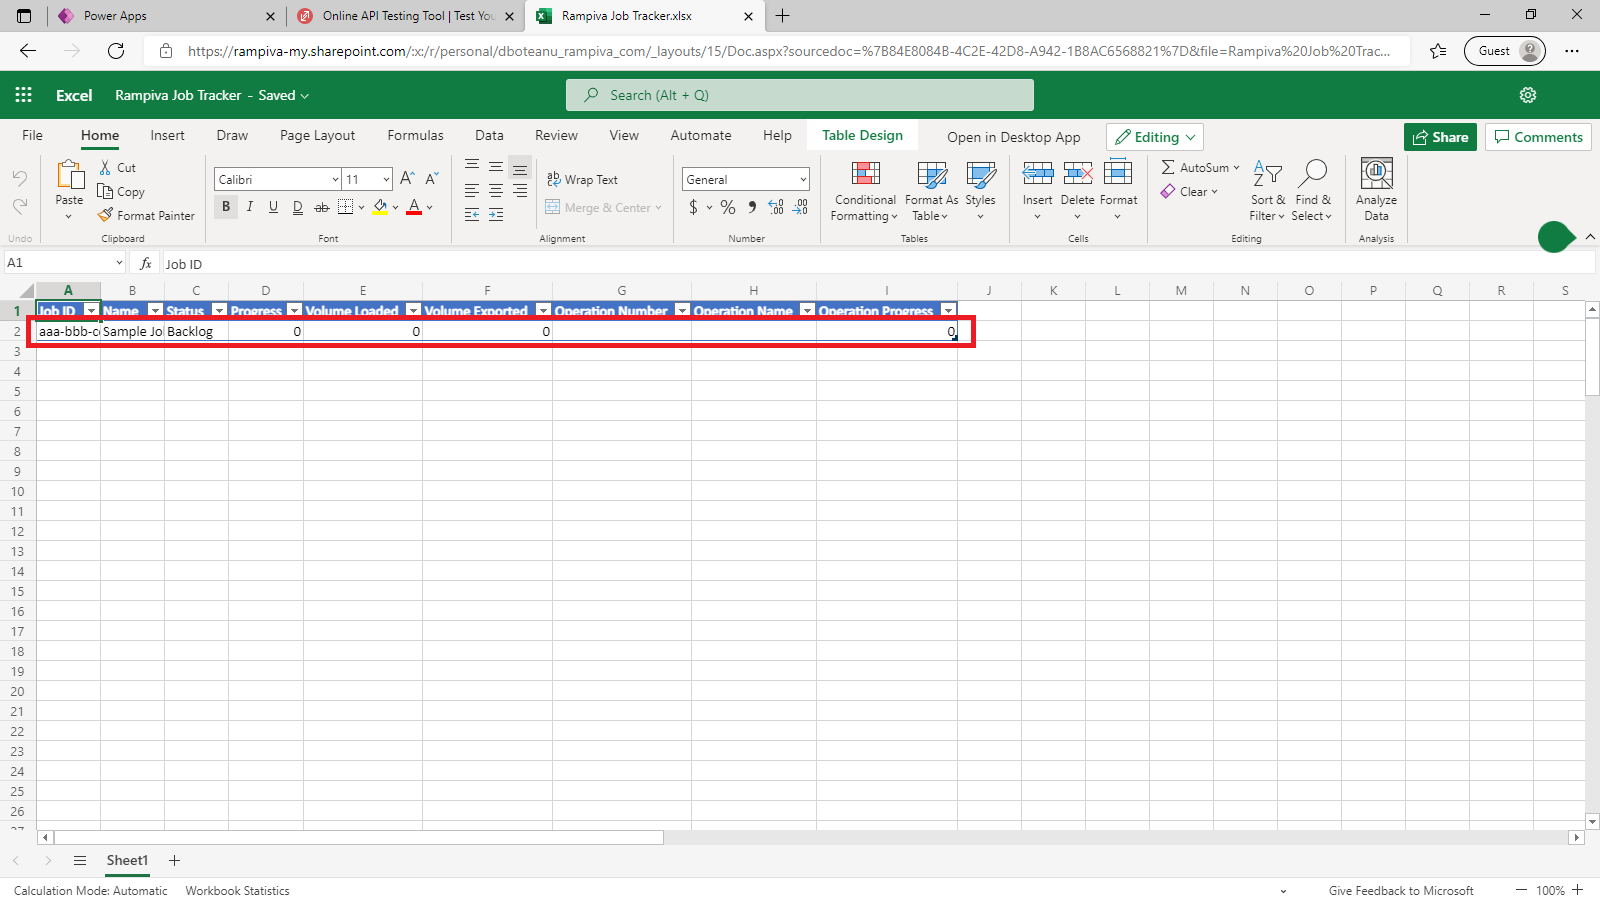 | ||||
| 8 | Return to the website https://reqbin.com . | 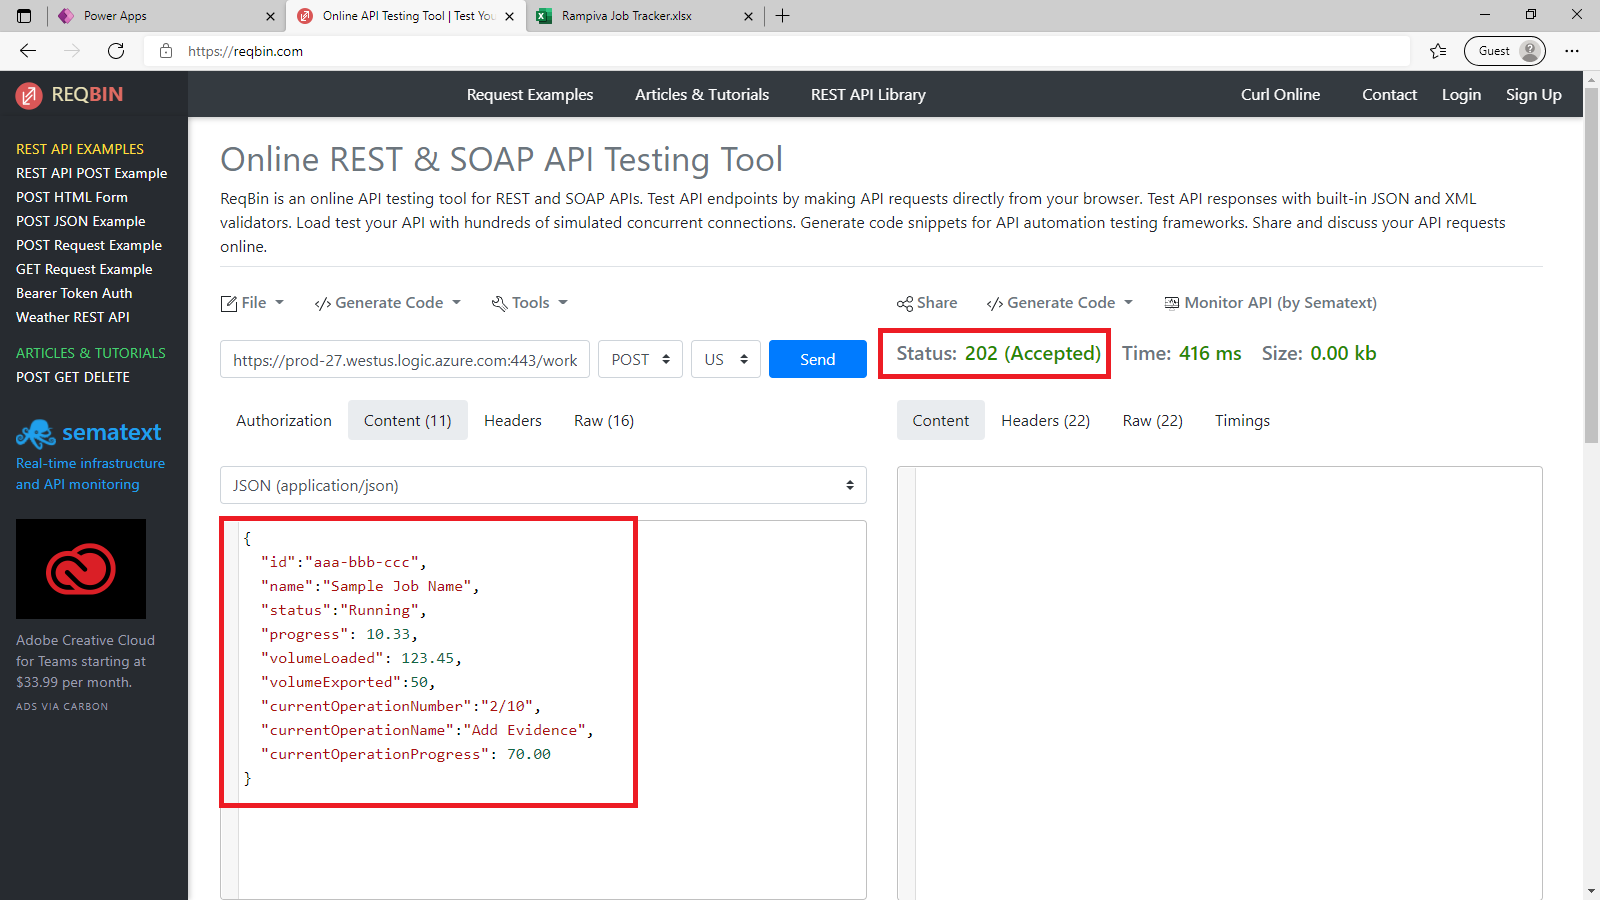 | ||||
| 9 | Set the contents to the following JSON data, to test updating an existing jobs record:
| |||||
| 10 | Click Send to submit the data and run the pipeline.
| |||||
| 11 | Return to the Excel file Rampiva Job Tracker.
| 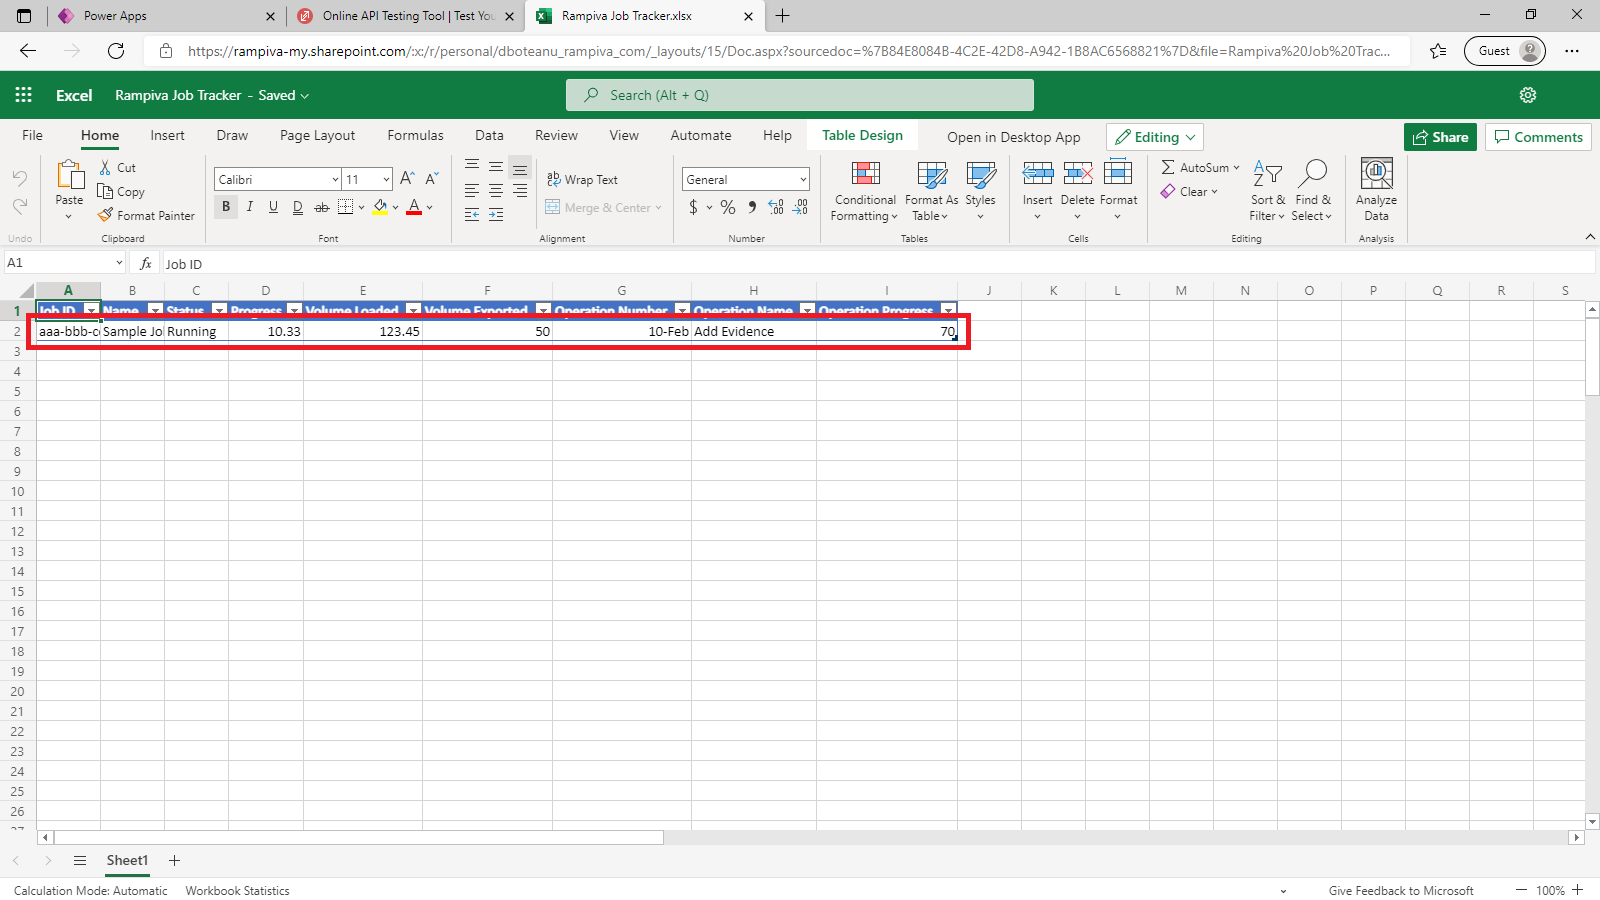 |
E. Configure the Rampiva Automate Workflow-Side Script
| 1 | On the Engine server that will run the jobs, create the script file C:\Scripts\PowerApps-update.py.
|
| |||||||
| 2 | Update line 8 from the script with the endpoint URL defined in the flow.
| Sample settings used in this guide:
| |||||||
| 3 | In Rampiva Automate, edit the Execution Profile used, and set the parameter | 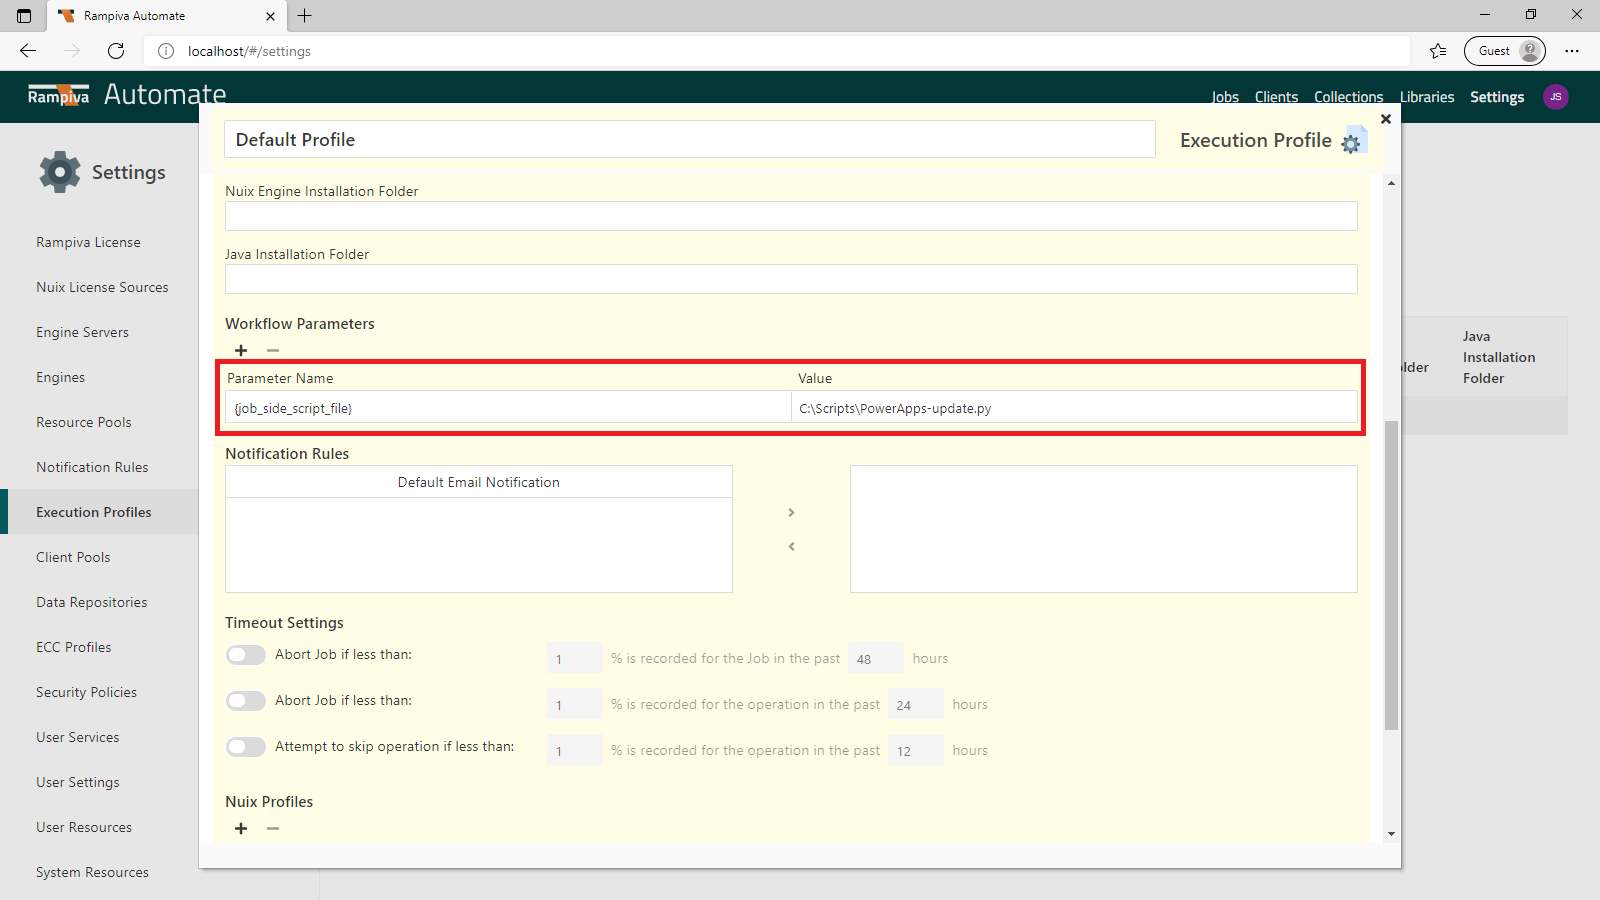 | |||||||
| 4 | Submit a Job with the updated Execution Profile. | 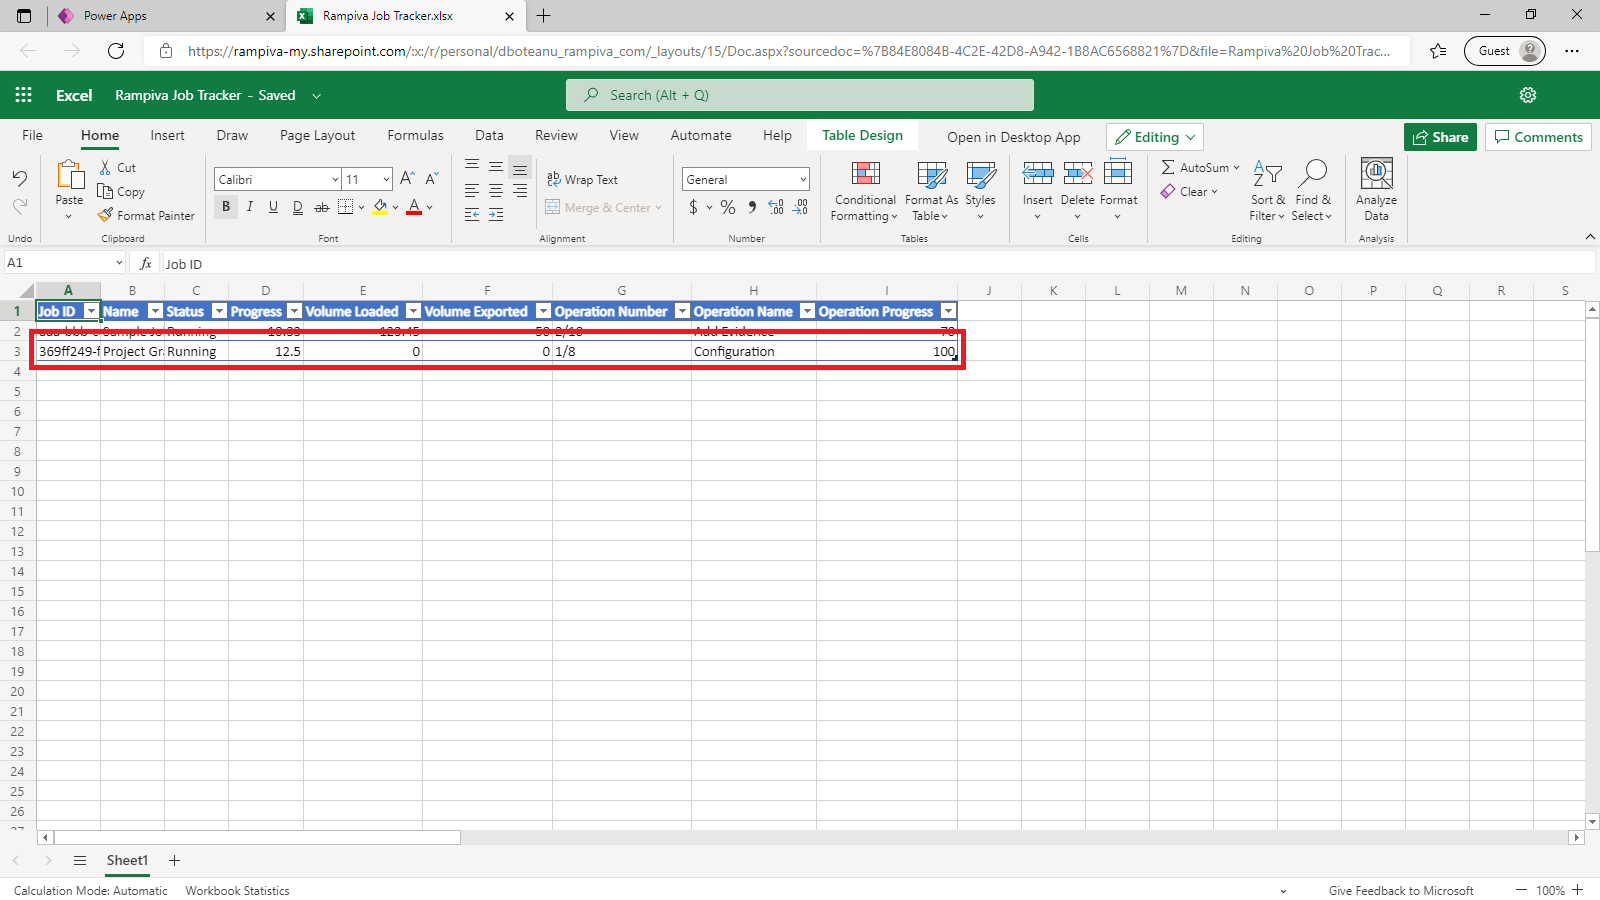 | |||||||
| 5 | Wait for the Job to start running, and then inspect the Excel spreadsheet table.
| ||||||||
| 6 | The Volume Loaded and Volume Exported fields are not automatically calculated. The job-side script expects this values to be available in the user-defined |
G. Troubleshooting
| 1 | By default, the job-side script does not output logs. Update the variables | Sample code to enable logging to both the Job Execution Log as well as to file in C:\Temp\logs:
| |||||
| 2 | If no log file is created when running a Job, inspect the Rampiva Engine log for python errors. | ||||||
| 3 | If the debug log file indicates that data is sent to Power Apps but data is not visible in Power Apps, inspect the Power Apps flow events for anomalies or errors. |